GHTest Getting Started
Recently I have caught the OS X software development bug and started hacking on a small project in this environment. As I am normally pretty keen to try out new APIs and indeed a whole new language, I was keen to get some unit testing going as early as possible. After a bit of research i discovered the preferred testing solution for this environment was GHUnit , so I downloaded this “framework” and installed it.
One of the first things that struck me was how dependant I was on xcode to get this up and running, and how damn confusing this was for the uninitiated. The myriad of windows you end up with in xcode 3.2.x was sending me crazy, this paired with the fact I a certain window was my project led me to upgrade to xcode 4.x.
So without further a do I have gathered together some screenshots on how I got my tests up and running once I had Xcode 4 installed.
Step 1: Create a project, in my case I am focused on Mac OS X desktop applications so I select Application from the options.
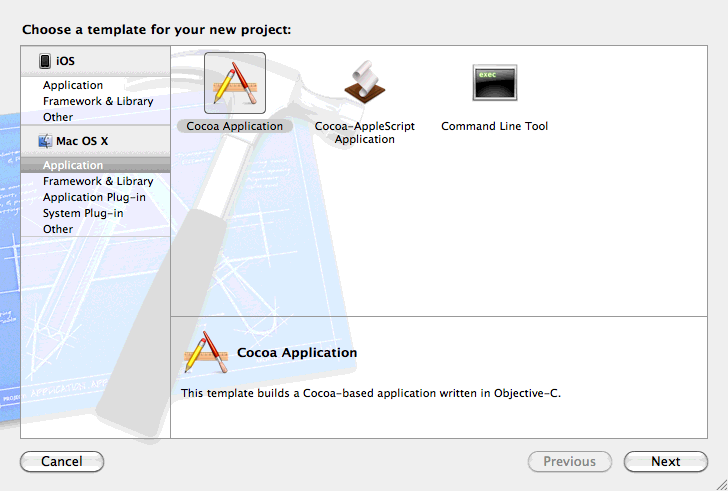
New Project Dialogue
Step 2: Enter a project name and company, then disable unit tests as this will include OCUnit which I am not currently using. Save it where you keep your projects.
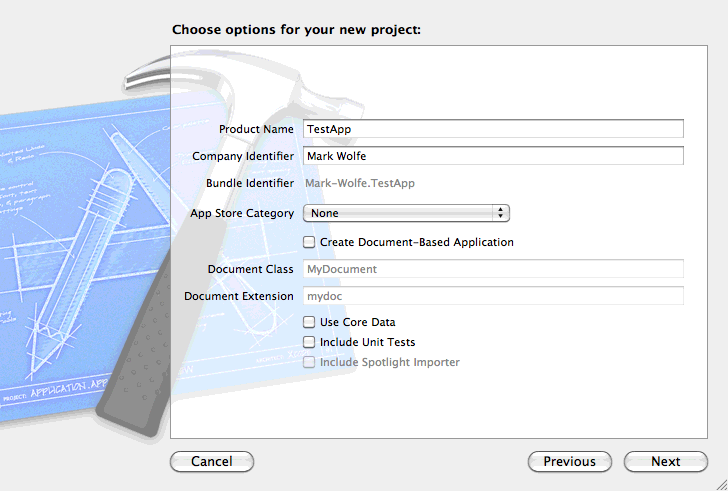
Project Details Dialogue
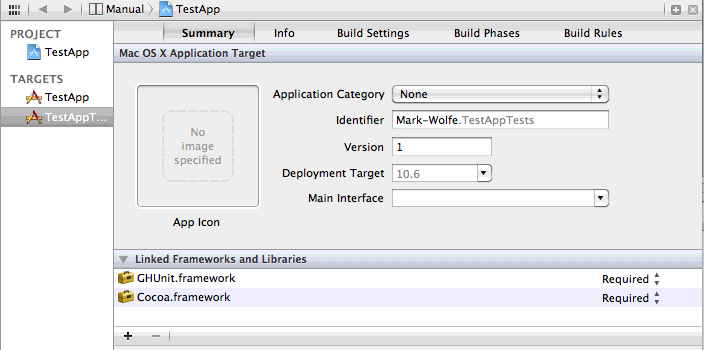
Step 3: Now add a new target, you should have a button down the bottom to Add Target, again click Mac OS X and select Application from the options and enter the details.
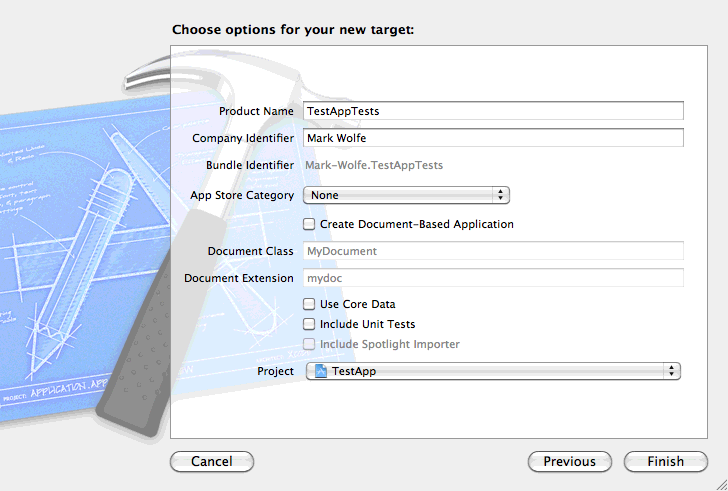
New Target Details Dialogue
Step 4: Delete all the files which we don’t need.
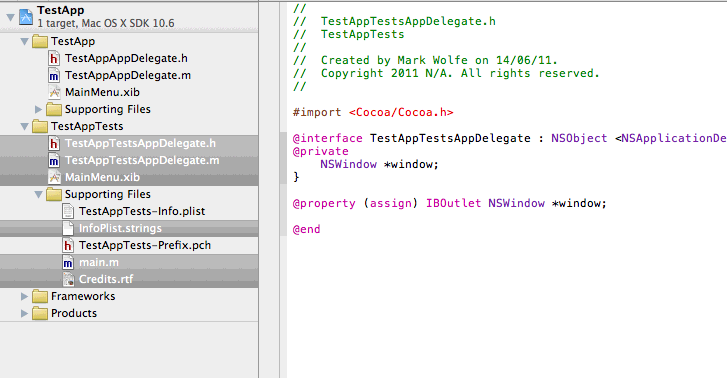
New Target Details Dialogue
Step 5: Remove the main nib file from the TestAppTests-Info.plist.
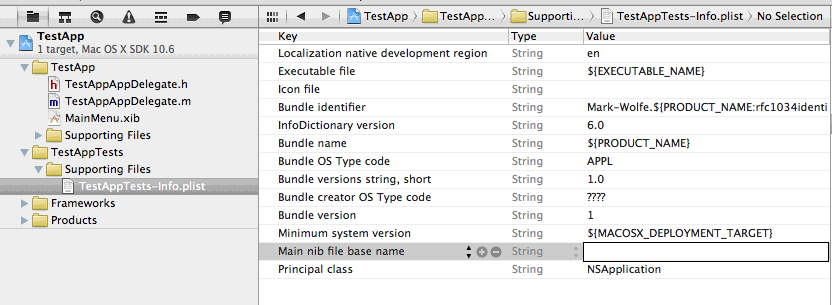
Editing TestAppTests plist
Step 6: Download GHUnitTestMain.m
from git hub and then drag and drop it into the TestAppTests folder in your xcode. Then add it to the TestAppTests target.
Select a target to add the file GHUnitTestMain.m to
Step 7: Download the GHUnit framework
extract it, then copy it to your /Library/Frameworks. Then select the TestAppTests target and click the plus button. Search for the GHUnit.framework and add it.
Add the GHUnit.framework to your project
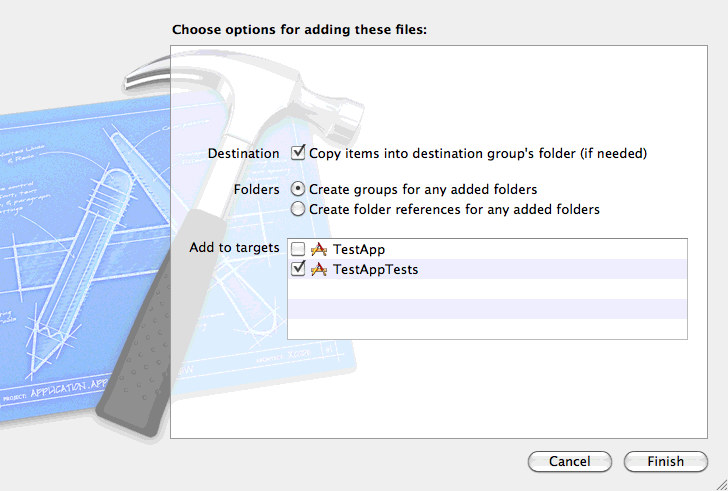
Step 8: Create a new test by creating a new empty file named SampleTest.m in the TestAppTests folder in Xcode and add the following code. Also ensure it is added to the TestAppTests target.
//
//  SampleTest.m
//  TestApp
//
//  Created by Mark Wolfe on 14/06/11.
//  Copyright 2011 N/A. All rights reserved.
//

#import <Foundation/Foundation.h>
#import <GHUnit/GHUnit.h>


@interface SampleTest : GHTestCase {}
@end


@implementation SampleTest

- (void)testSomeStringsEqualEachOther{

    NSString *someString = @"Have me some objective c testing";

    GHAssertEquals(@"Have me some objective c testing", someString, @"The strings should match bro");
}

@end
Your project should look as follows.
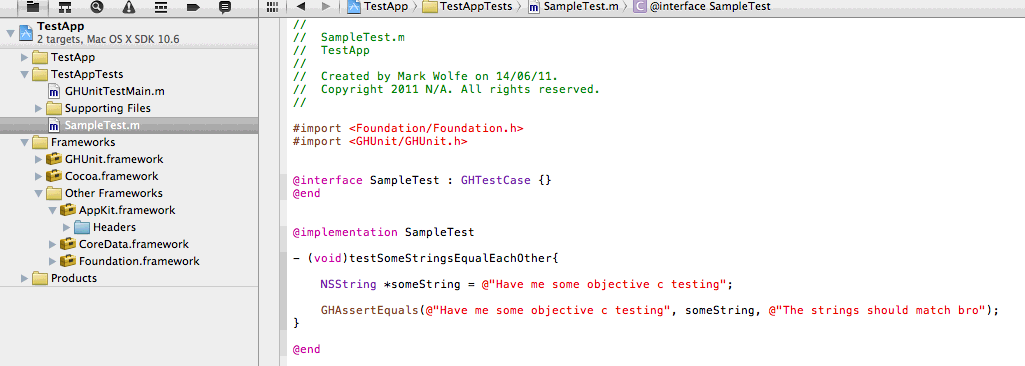
Unit test in your project
Step 9: Now set the active scheme to TestAppTests and click the play button, all going well you should see the following application pop up with your test listed in it ready to run.
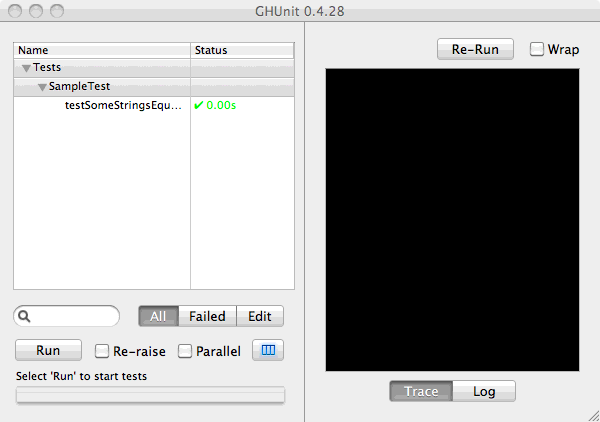
Unit test application displaying tests to run
Now that is all setup you should be able to add tests to your hearts content. So far GHUnit has enabled me to test a wide array of routines and frameworks which my application will rely upon.