AWS User Federation with Keycloak
As a user of Amazon Web Services (AWS) in large organisations I am always mindful of providing a mechanism to enable single sign on (SSO) to simplify the login process for users, enable strict controls for the organisation, and simplify on/off boarding for operations staff. As an advocate for open source I was happy find Keycloak , which is developed by Redhat and is now an option for organisations looking for an open solution to identity federation with AWS.
This post will detail how I configured Keycloak with AWS SAML federation.
To demonstrate Keycloak I have setup a docker-compose project which can be cloned from https://github.com/wolfeidau/keycloak-docker-compose .
Assuming you have docker for mac installed you should be able to navigate to the project then run.
docker-compose up -d
Then to ensure it is all working you should be able to navigate to http://0.0.0.0:18080/auth/admin/master/console/#/realms/master.
Setup of the AWS SAML Client
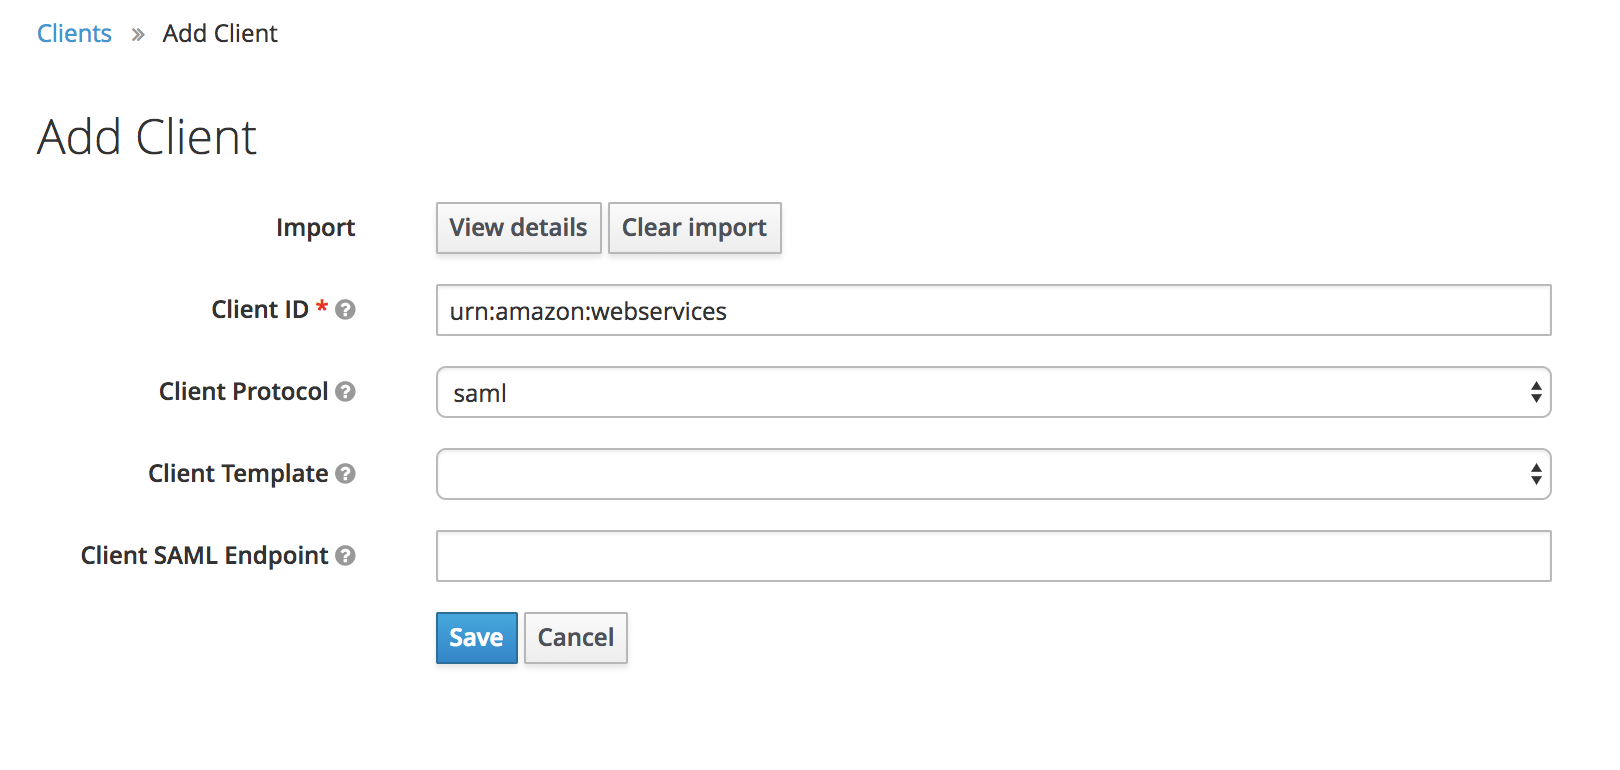
To simplify the automated setup we can export a client configuration file containing the AWS SAML configuration, in my case I did this in the master realm then exported it.
First thing you need to do is download https://signin.aws.amazon.com/static/saml-metadata.xml , just put it in your Downloads folder.
Once you login navigate to clients http://0.0.0.0:18080/auth/admin/master/console/#/realms/master/clients then hit the create button and import the saml-metadata.xml file, then hit save.
Keycloak AWS Client Creation
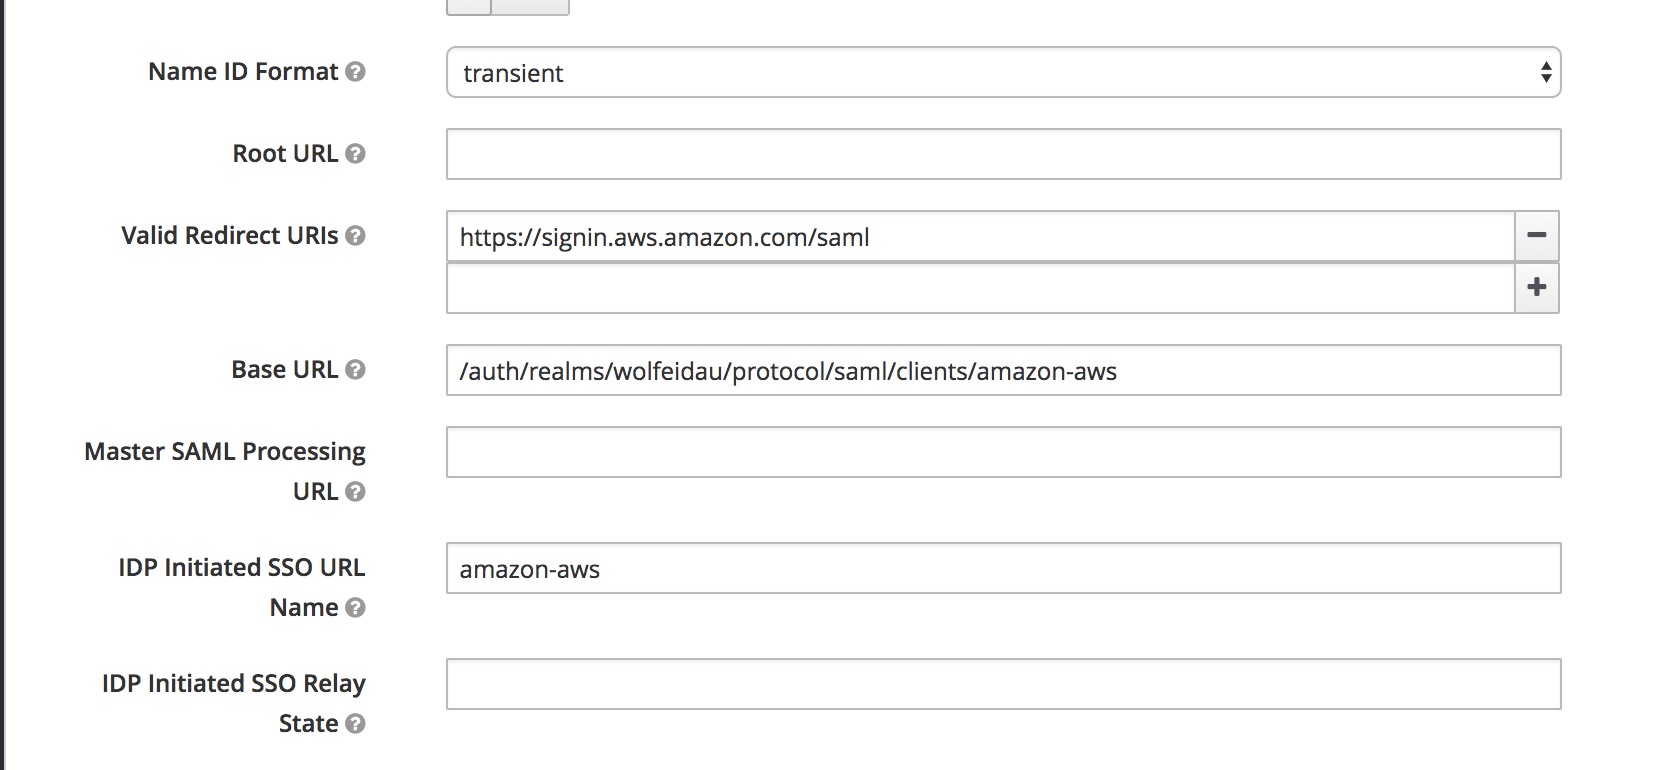
Now configure:
- IDP Initiated SSO URL Name to
amazon-aws - Base URL to
/auth/realms/wolfeidau/protocol/saml/clients/amazon-aws
Keycloak AWS Client Configuration
Lastly under the Scope tab disable Full Scope Allowed, this will ensure we only pass through the roles configured in our client to AWS.

Keycloak AWS Client Scope Configuration
Now you can navigate back to http://0.0.0.0:18080/auth/admin/master/console/#/realms/master/clients and hit the export button next to the aws client.
Keycloak Setup Using Admin CLI
As a big proponent of automation I really wanted to illustrate, and indeed learn how to automate setup of keycloak, hence the CLI approach.
To get the tools we need for this guide download keycloak from Keycloak Downloads
and extract this to say $HOME/Development/keycloak then add $HOME/Development/keycloak/bin to your $PATH as per Keycloak administration CLI docs
.
export PATH=$PATH:$HOME/Development/keycloak/bin
Note: Commands which create new objects generate a unique GUID which looks like 6c684579-51a1-4bdf-a694-d641199874d8, you will need to adjust those values in the subsequent commands.
Now we can use the administration CLI program to configure our keycloak service.
To test it out and configure your account locally.
kcadm.sh config credentials --server http://0.0.0.0:18080/auth --realm master --user admin
Create a realm, in my case I am naming this wolfeidau.
$ kcadm.sh create realms -s realm=wolfeidau -s enabled=true
Import the keycloak client for AWS and add it to the wolfeidau realm we created, the JSON file is in the keycloak-docker-compose project.
$ kcadm.sh create clients -r wolfeidau -s clientId="urn:amazon:webservices" -s enabled=true -f urn-amazon-webservices.json
Created new client with id '6c684579-51a1-4bdf-a694-d641199874d8'
Create our AWS role under the AWS client, note this is an example name you will need to replace 123456789012 with your account id.
kcadm.sh create clients/6c684579-51a1-4bdf-a694-d641199874d8/roles -r wolfeidau -s 'name=arn:aws:iam::123456789012:role/wolfeidau-admin,arn:aws:iam::123456789012:saml-provider/docker-keycloak' -s 'description=AWS Administration Access'
Created new role with id 'docker-keycloak'
Create a group to grant AWS administration access.
$ kcadm.sh create groups -r wolfeidau -s name=aws-admins
Created new group with id 'dd02ed86-dd49-47c6-bd8a-5f74844b56d0'
Add a role to the group, note this is an example name you will need to replace 123456789012 with your account id.
$ kcadm.sh add-roles -r wolfeidau --gname 'aws-admins' --cclientid 'urn:amazon:webservices' --rolename 'arn:aws:iam::123456789012:role/wolfeidau-admin,arn:aws:iam::123456789012:saml-provider/docker-keycloak'
Create a user for testing.
$ kcadm.sh create users -r wolfeidau -s username=wolfeidau -s email=mark@wolfe.id.au -s enabled=true
Created new user with id 'eb02cbfd-fa9c-4094-a437-3a218be53fe9'
Reset the users password and require update on login.
$ kcadm.sh update users/eb02cbfd-fa9c-4094-a437-3a218be53fe9/reset-password -r wolfeidau -s type=password -s value=NEWPASSWORD -s temporary=true -n
Add the user to our AWS administration group.
$ kcadm.sh update users/eb02cbfd-fa9c-4094-a437-3a218be53fe9/groups/dd02ed86-dd49-47c6-bd8a-5f74844b56d0 -r wolfeidau -s realm=wolfeidau -s userId=eb02cbfd-fa9c-4094-a437-3a218be53fe9 -s groupId=dd02ed86-dd49-47c6-bd8a-5f74844b56d0 -n
Export the metadata file required by AWS to setup the SAML provider.
$ kcadm.sh get -r wolfeidau clients/6c684579-51a1-4bdf-a694-d641199874d8/installation/providers/saml-idp-descriptor > client-tailored-saml-idp-metadata.xml
AWS Setup
Create the AWS SAML Provider in your account using the metadata file exported from keycloak.
aws iam create-saml-provider --saml-metadata-document file://client-tailored-saml-idp-metadata.xml --name docker-keycloak
Deploy the cloudformation template supplied in the keycloak-docker-compose project, this contains the SAML SSO IAM roles and saves clicking around in the UI.
aws cloudformation create-stack --capabilities CAPABILITY_IAM --stack-name sso-roles --template-body file://sso-roles-cfn.yaml
Note: You can just create the saml provider and launch the cloudformation from the AWS console.
Logging Into AWS
Now you should be ready to log into AWS using keycloak using the link http://0.0.0.0:18080/auth/realms/wolfeidau/protocol/saml/clients/amazon-aws.
Command Line SAML Authentication
To enable the use of SAML by command line tools such as ansible and the AWS CLI my colleagues and I developed saml2aws .