Building a WLToys A979 donkey car
In my spare time I spend a bit of time building and working on a scaled down self driving RC project which uses an opensource project called donkeycar . I have been through a few generations of car, learning how both the hardware and software worked, hopefully I can provide some tips on how to avoid at least some of my mistakes in this post.
Current Car
Starting Out
Probably the lion share of lessons, at least initially were learnt about how to setup a custom RC car, especially the power and drive train. I have put together a bunch of recommendations:
- Always buy at least two servos, and check the number of teeth, force, and dimensions carefully.
- Learn to solder bullet connectors, there are some good tutorials on youtube including on how to get the nice shrink wrapped look.
- Always use a seperate power supply for the computer on your car, there are a number of reasons you can cause voltage drops during operation of the car, keeping things isolated will avoid the computer crashing and a car running into a wall.
- Cable ties are a life saver when hiding or stashing cables, buy a good collection of sizes.
- Start out with brushed motors, they are cheap and work better at low speeds.
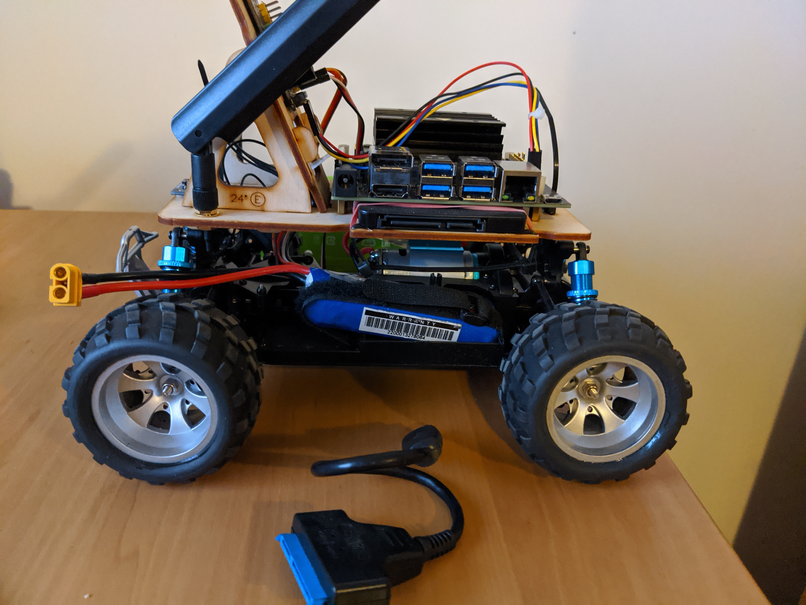
The Car Build
For the base of my current build I chose the WLToys A979 4WD Truck, this was for a few reasons:
- Same base as the original AWS Deepracer .
- Good solid build and lots of spares available online.
- Short wheelbase and good turning circle so great for use indoors.
- Cheap and easy to purchase and ship to Australia.
- Has a brushed motor which is great at low speeds, which is very important indoors and while learning to drive.
You can buy it from banggood for approx 90 AUD.
Then I replaced the Electronic Speed controller(ESC) with a Turnigy 20A BRUSHED ESC as the one provided was integrated with the radio and servo using some sort of proprietary setup.
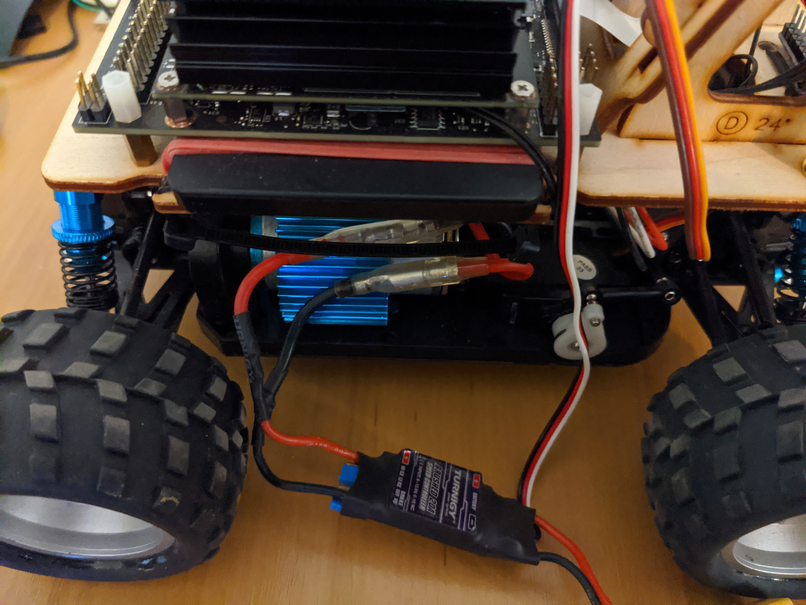
Motor Wiring
Lastly I replaced the servo with a Turnigy™ S3101S Servo 2.4kg / 0.14sec / 17g 24T .
To connect all this stuff you will need some extra parts.
- Heat shrink such as Turnigy Heat Shrink Tube 4mm Black .
- Bullet connectors such as 4mm Easy Solder Gold Connectors (10 pairs) .
- XT60 connectors which are used to connect 2s batteries such as Nylon XT60 Connectors Male/Female (5 pairs) .
This will also be useful with any power upgrades such as the one listed down the bottom.
The Compute Build
To mount the compute on top of the car I used Dingo-Mount which was cut on a laser cutter at CCHS using some 3mm ply wood, which is light and strong.
The hardware I use on top of the car is as follows:
- Jetson Nano which you can buy from seeed studio .
- Intel 8265.NGWMG.DTX1 DUAL BAND Wireless-AC 8265 Desktop KIT .
- Raspberry Pi Camera Module V2 also buy from from seeed studio .
- An SSD to store all your data on, and because running this machine off sdcard is very slow. I used a Crucial BX500 240GB 3D NAND SATA 2.5-inch SSD .
- A USB to SATA cable such as Onvian USB 3.0 To SATA 22 Pin 15+7 Pin 2.5 Inch Hard Disk Driver SSD Adapter Data Power Cable .
- A USB powerbank such as 18W Power Bank, ROMOSS 20000mAh Portable Charger .
I used some brass standoffs, like these M2.5 Male Female Hex Brass Spacer Standoff which are similar to the ones you get when you buy a computer case, this enabled me to mount the SSD under my jetson nano, with some rubber acting avoiding the bottom of the board shorting out on the SSD.
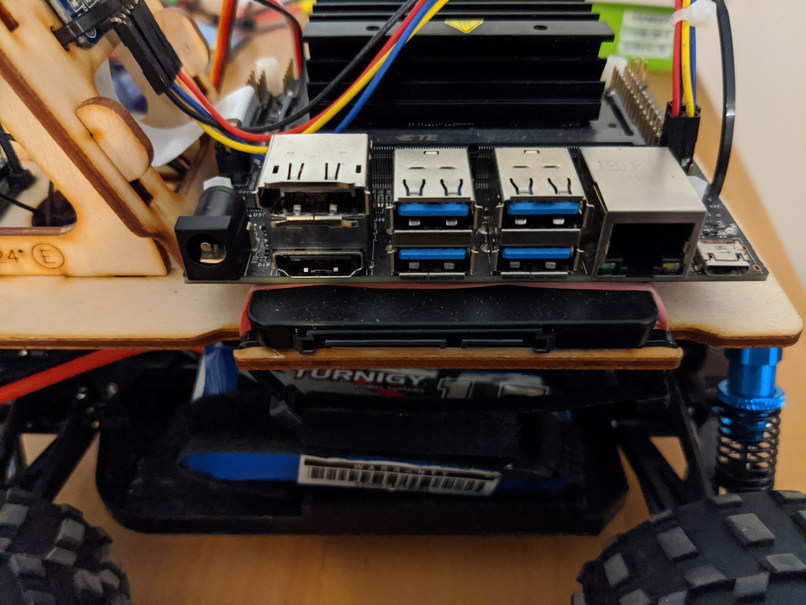
SSD Mounting
To drive the servo and ESC I used Adafruit PCA9685 16-Channel Servo Driver which you can get from Core Electronics or purchase something similar from aliexpress .
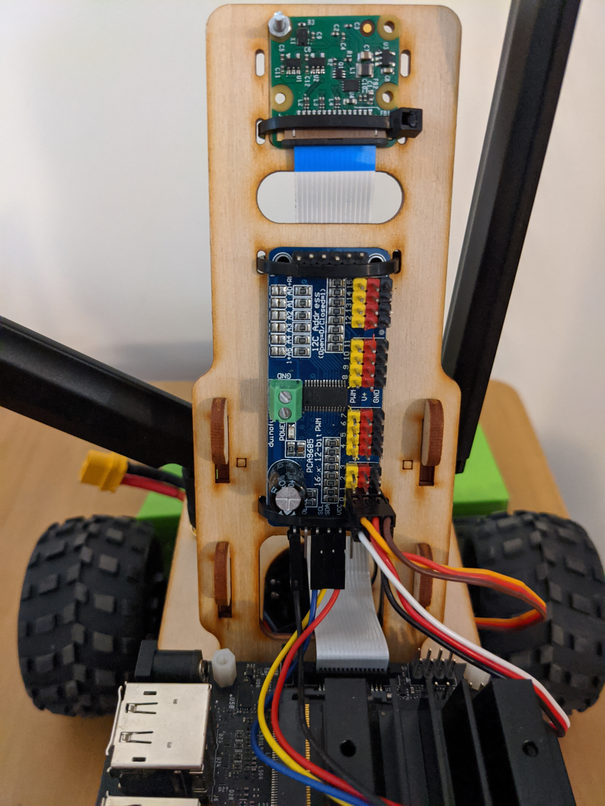
Camera and Servo Board
Power Options
If you want to use the full power of the Jetson Nano compute then you may need to get your self a SBEC such as Turnigy 5A (8-40v) SBEC for Lipo and rig up an extra 2S1P LIPO such as Turnigy nano-tech 2200mah 2S 25~50C Lipo Pack . I use this setup currently to avoid drop outs when doing inference with higher resolution images (224px * 224px). Attached to this is a 2.1mm Barrel Cable I had laying around.
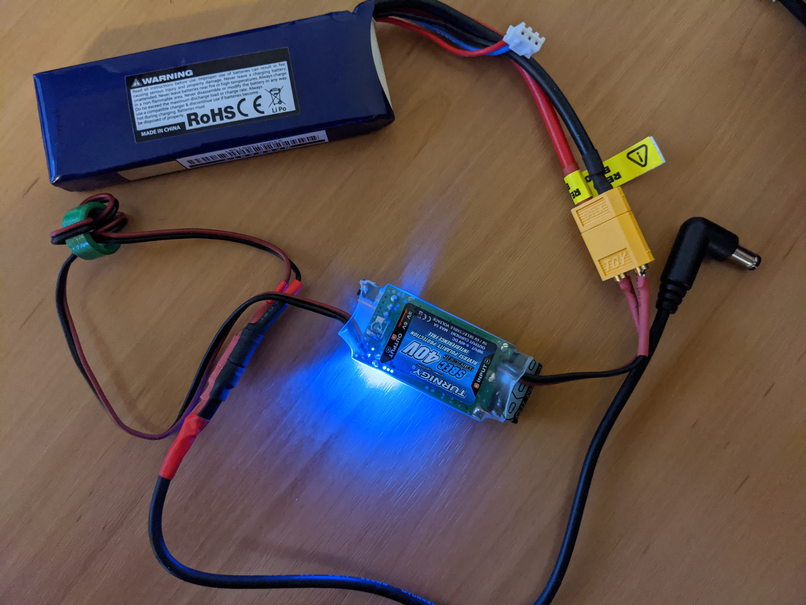
Power Loop with SBEC
Driving Demonstration
This is my car in auto pilot running around a tight track in the CCHS workshop.